Best Windows File Explorer Tips And Tricks On Windows 11
With the release of Windows 11, Microsoft is finally delivering an updated version of File Explorer. The software retains the same recognizable style as the previous edition, but new visual components and improvements make it the most significant update in many years.
The new File Explorer is built on the Windows UI Library (WinUI), which provides new styles and controls to revitalize the aesthetics and motion of Windows 11 programs. Consequently, we now have a file manager with a clean and simple design, a new command bar, new icons, and many other enhancements.
This article will go through all of the best Windows File Explorer tricks on Windows 11, which could be implemented immediately.
11 Best Windows Explorer Tricks For Windows 11
Eleven seems to be the magical number here; these are eleven tips and tricks for Windows Explorer on Windows, which will surely make the experience more delightful and smooth for you.
-
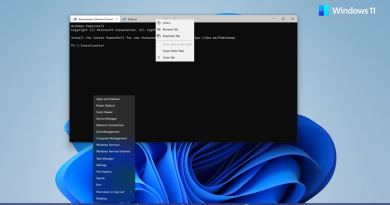
Compact View

If you have too many files and folders in File Explorer, you would like the icons and text to have gone a little smaller. That’s where the Compact View of File Explorer comes into play.
Press the ALT key, and then click on the View menu and select Compact View. The space between the list will reduce, and you will be able to see more content. It also changes the spacing on the left pane, which displays Quick Access, OneDrive, This PC, Libraries, and more.
-
Modify The File Explorer Target Folder

To change the folder in which your File Explorer window starts, launch a File Explorer window and click the three-dot menu. Then, go to the Options > General tab and select This PC or Quick Access item from the list.
Quick Access is convenient if you want to check on the recently modified or created file quickly. However, if you need to access drive and other connected devices, This PC is right for you.
-
Open Several File Explorer Windows And Dock Them Side By Side
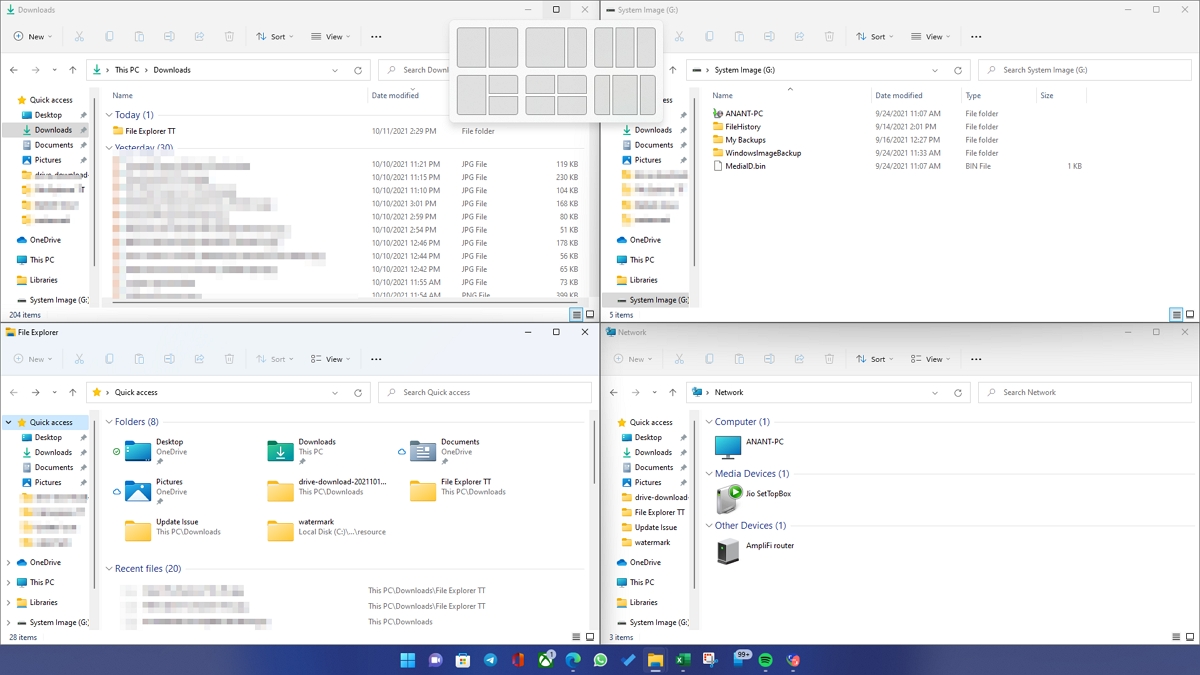
Multiple File Explorer windows may help transfer files or quickly navigate between folders. By using the Win + E key, you may open as many File Explorer windows as you need. Use the combination once to open one window, then again to open two more, and so on.
You may also dock two windows in a variety of ways by pressing Win +
Left/Right/Up/Down arrow keys. For example, if you wish to dock two windows side by side, open the windows and hit Win + Left/Right.
In Windows 11, snapping windows is now on another level. Hover over the maximize button, and you can snap in 6 different ways and a maximum of six windows.
-
Get Rid Of Recent Files And Folders
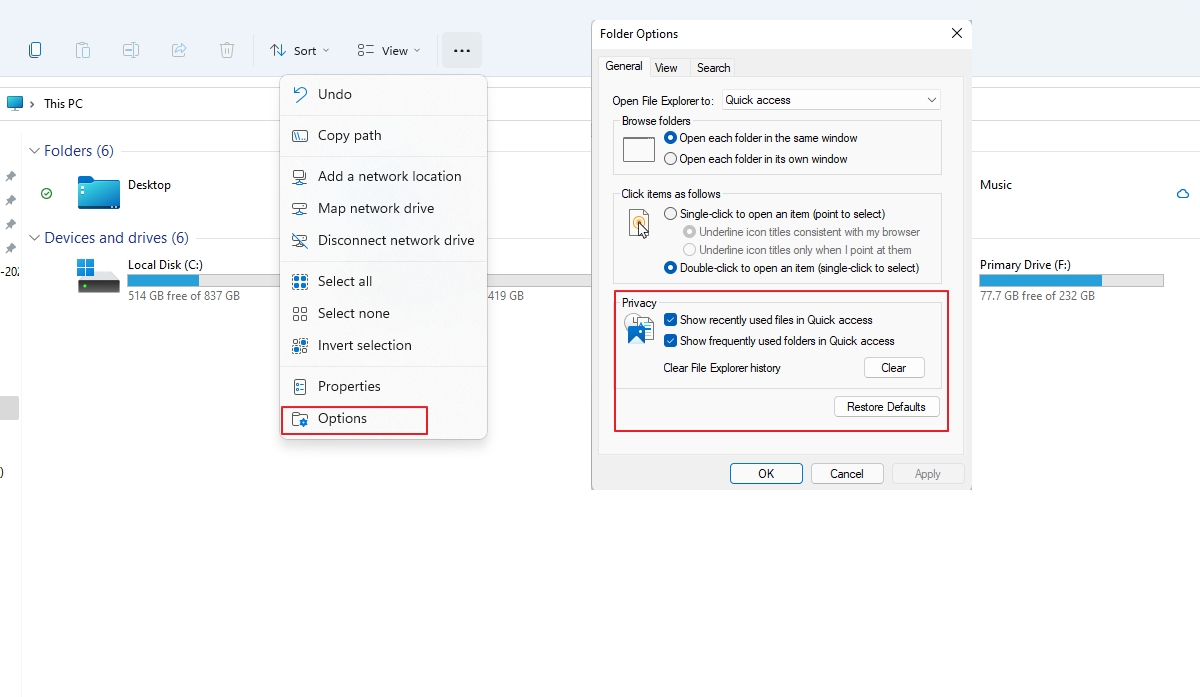
While one to hide the recently accessed files and folders is to change the default folder of File Explorer, but a better way is to remove them from appearing permanently. A small warning, though. It’s a convenient feature if you deal with a lot of files every day.
Open File Explorer and click on the three-dot menu > Options > General Tab > Privacy to remove recent files or folders from Quick access. Uncheck in the Privacy section, the show recently used files in Quick Access and shows commonly used folders in Quick Access.
-
Share Files From Within File Explorer
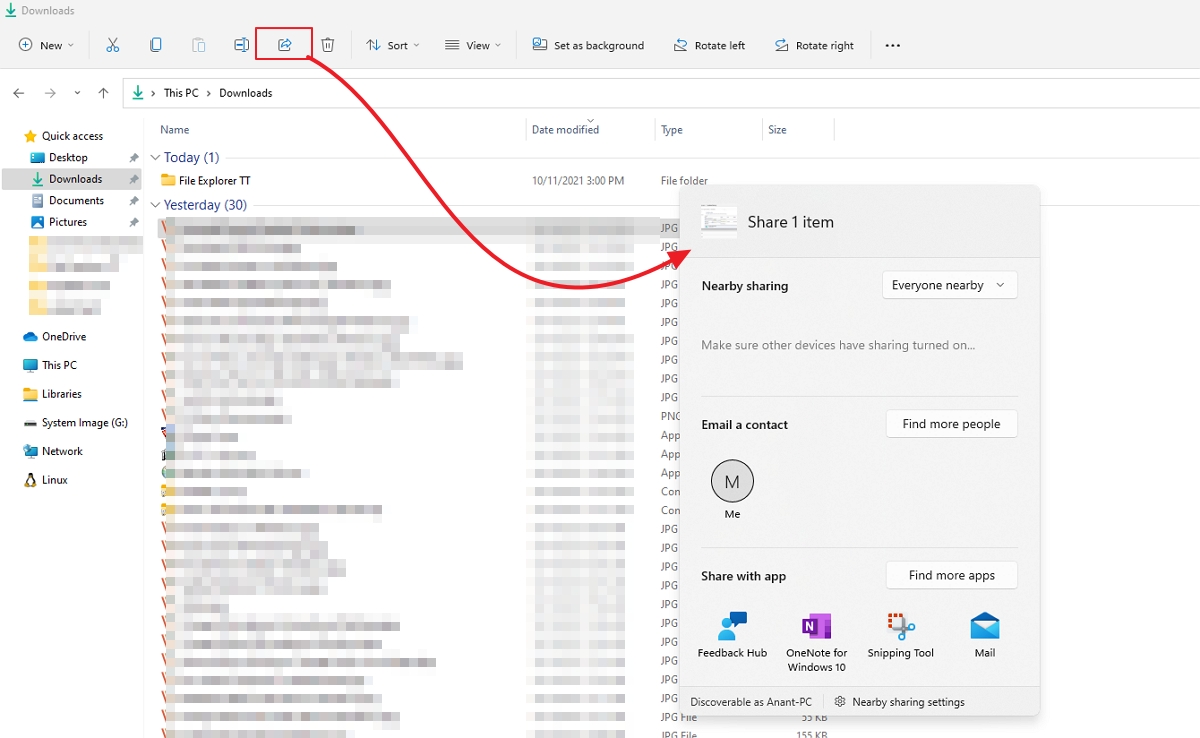
Windows offers an enhanced way to share files using its mega share menu, which connects other PCs on the network using Nearby sharing, Email/Contact list, and other applications. You need to select a file and click on the Share icon on the File Explorer.
-
Customize The Quick Access View

At the top of the left panel, the File Explorer Quick Access area is shown and displays your most frequently used folders and recent files. Because it includes the folders and files you’ll want to often access, you may customize the Quick Access view to make it even more helpful.
To manually add folders to the Quick Access section, right-click any folder in File Explorer and choose Pin to Quick Access from the pop-up menu. Files and folders may always be unpinned from Quick Access by right-clicking the item and selecting Unpin from Quick Access from the pop-up menu.
You may change the order of the items in Quick Access by dragging them up or down the list. Quick Access is even included on the Windows taskbar. When you right-click on the File Explorer icon on the taskbar, your Quick Access pinned folders will show in the menu.
-
Enable Item Checkbox
Those who need to select multiple files and move them here and there will find using the Shift or Control key inconvenient. One small mistake and all the selection will be undone. Instead, you can enable the Item Checkbox so you can select the files in peace and never lose them. This feature shows a checkbox next to the file or folder when you mouse over them. Select them, and then they will stay unless you uncheck the box.
-
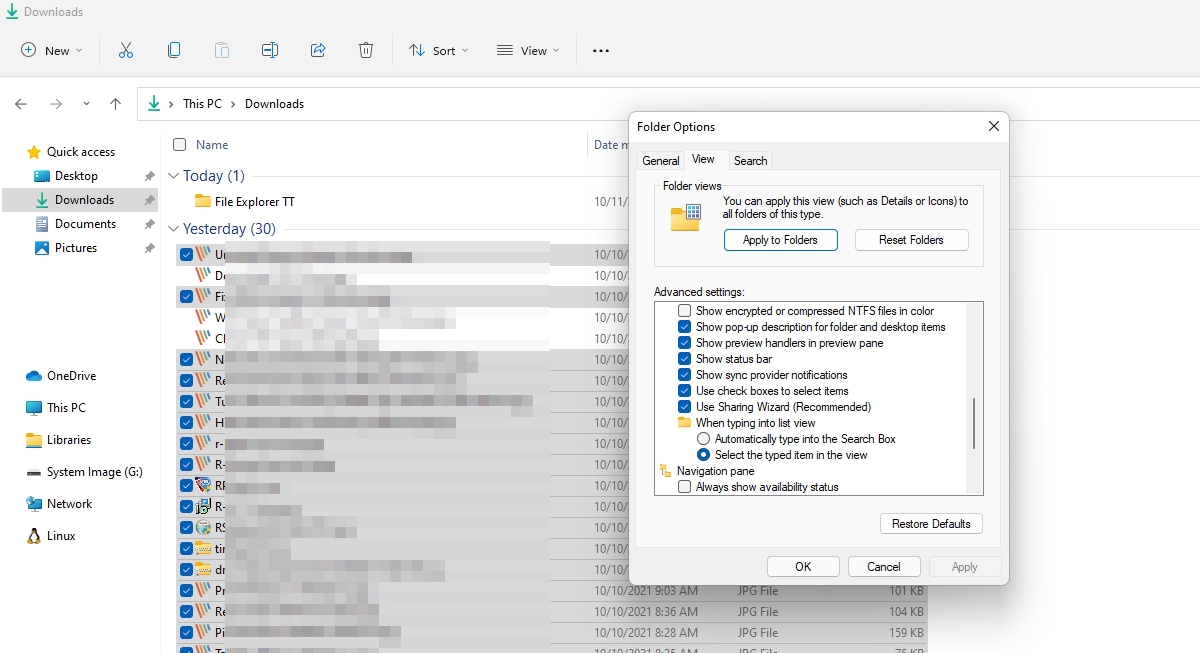
Display Your Libraries

Windows 11 has a Libraries feature for storing frequently used folders. However, it does not show your libraries by default. If you wish to use libraries and have them readily available, you must first set them up to display in File Explorer.
Open File Explorer, and click on the three-dot menu, and then select properties. Switch to the View tab and then click the Navigation panel icon. Select Show libraries from the pop-up menu. In File Explorer, your libraries show at the bottom of the left window.
-
Share Files With PC, Apps, and People
Windows offers an enhanced way to share files using its mega share menu, which connects other PCs on the network using Nearby sharing, Email/Contact list, and other applications. You need to select a file and click on the Share icon on the File Explorer.
First, select a file, and then click on the Share button. You can then connect with apps or people, or computers. The number of apps depends on the kind of file and whether or not apps are already installed. Choose the person or app to whom you want to send the file.
convenient
-
Upload Files To OneDrive Online Storage
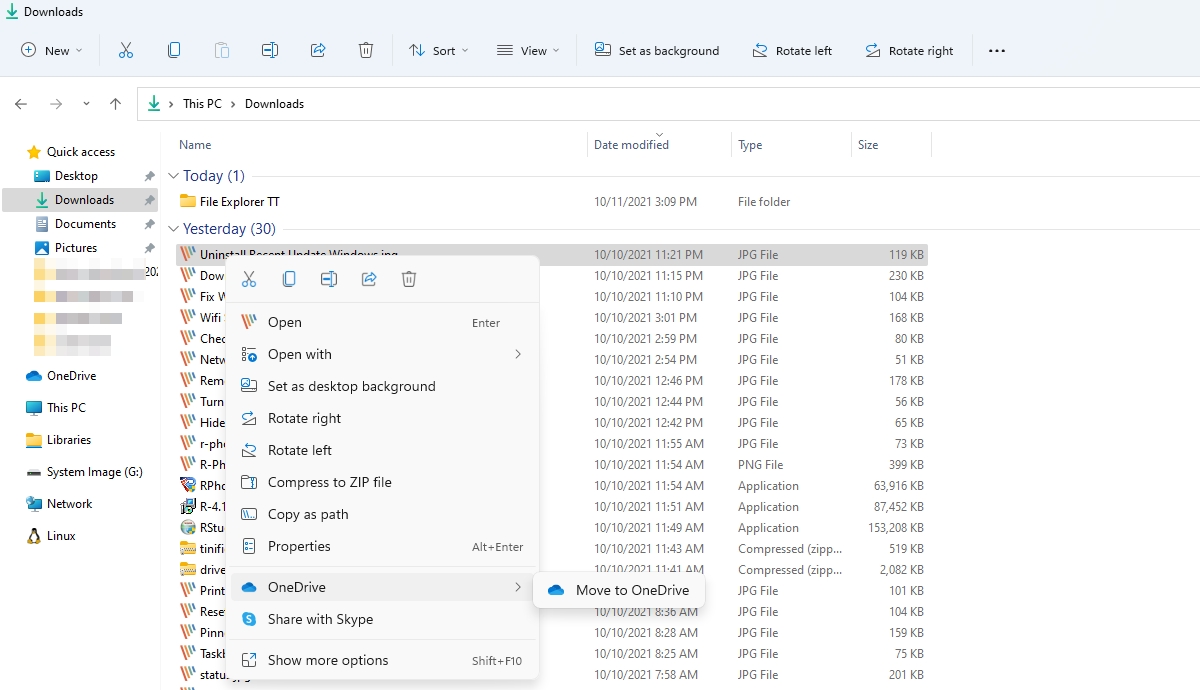
Those using OneDrive in Windows will appreciate the neat integration of the OneDrive menu in the context. To move a file into OneDrive without any copy-paste, right-click on it, select OneDrive, and then Move to OneDrive.
-
Look For Files And Documents.
You may search for specific files by name, extension, or other criteria. You may also search for files with particular words or extensions using the ever-popular “?” or “*” wildcard characters. Click the folder containing the file you wish to find in File Explorer. A search box with a magnifying glass icon may be seen in the upper-right corner.
Assume you’re looking for a file with the word “business” in the title or contents. Enter the keyword in the search box and then click the right arrow to start the search.
Assume you wish to restrict the search to just Word documents with the word “business” in the filename. Enter business.docx in the search box, and File Explorer gives only Word documents as results.
You may further narrow your search to include all files of a specific file. Perhaps you’re looking for all JPG files. Simply type *.jpg into the search bar.
You’ll notice that the Search ribbon provides several different ways to limit your search. You may search by kind, size, modification date, and other criteria, and you can even save your search to use it again later. You may also broaden your search by choosing “This PC” as the destination and searching for a file across your whole machine.
Conclusion
If you aren’t keen on utilizing the Command Line Interface, Windows File Explorer is your sole choice to navigate the OS. So, taking the time to perfect it may be enriching. And if the built-in File Explorer features aren’t enough, there are lots of third-party options that can improve your File Explorer experience. Even though File Explorer has a new look and feel, it is still the same application.